Telegram Subscriber Manager
A Subscriber Manager within a chatbot platform serves as an essential tool for effectivelyhandling and engaging with your chatbot`s user base or subscribers. It provides a wide range of functionalities that include subscribers’ segmentation, communication tools, data administration, automation capabilities, and comprehensive reporting features. These functionalities are designed to improve the overall user experience and optimize the efficiency of your chatbot interactions.
Accessing the Subscriber Manager
To access the Subscriber Manager in the chatbot platform, follow these steps:
- Navigate to the dashboard.
- On the left sidebar of the dashboard, find the `Subscriber Manager` under Telegram and click on it.
Managing Labels
A label serves as a tag or identifier employed to categorize and group subscriber data or entities. Labels are primarily utilized to introduce a structured and easily searchable organization to information. They act as a means to append metadata or descriptive details to items, simplifying their management, search ability, and organization within digital systems.
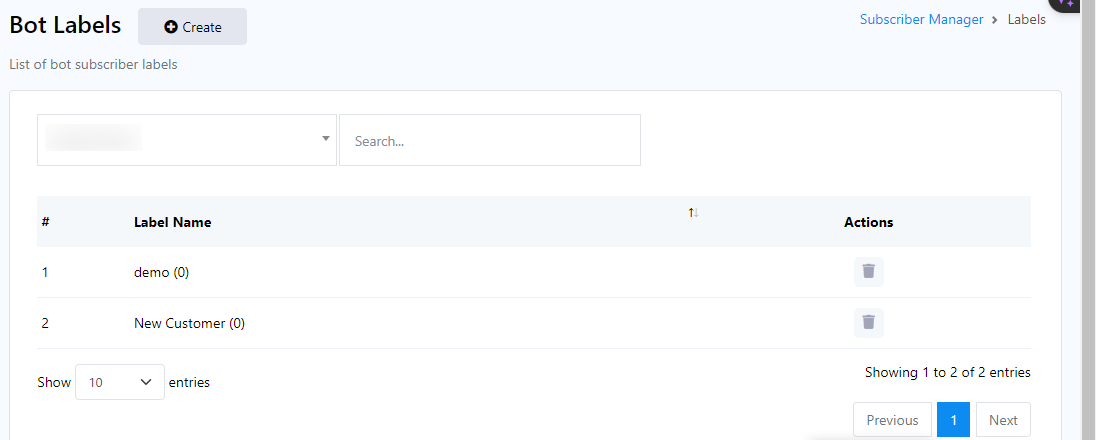
To effectively manage labels, please follow these steps within the Telegram Subscriber Manager:
- Begin by accessing the `Manage Label` field within the Telegram Subscriber Manager Menu.
- To create new labels for organizing your data, simply click the `Create` button.
- You can also locate labels by conducting a search in the `Search Bar`.
- If you wish to associate a label with a specific bot, click on the dropdown menu, and after selecting a bot, the associated labels for that bot will be displayed below.
Create Label
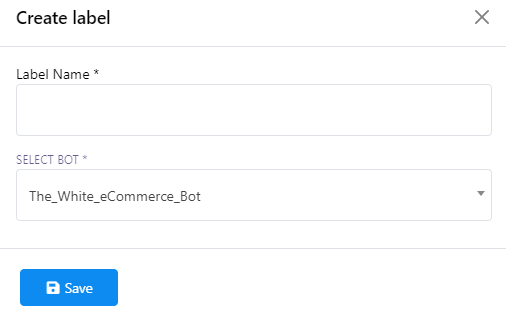
To create a new label, please follow these steps:
- Click on the `Create` button to initiate the label creation process.
- After clicking, youll be prompted to provide a title for the label and select a bot from the dropdown menu.
- Once you`ve filled in the necessary information, save the label.
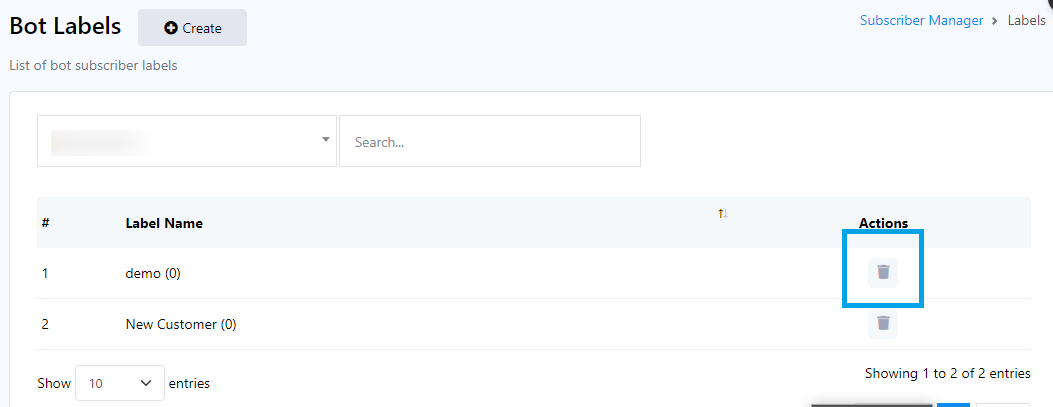
Delete Label
To delete a label, simply click on the action button next to the label name.
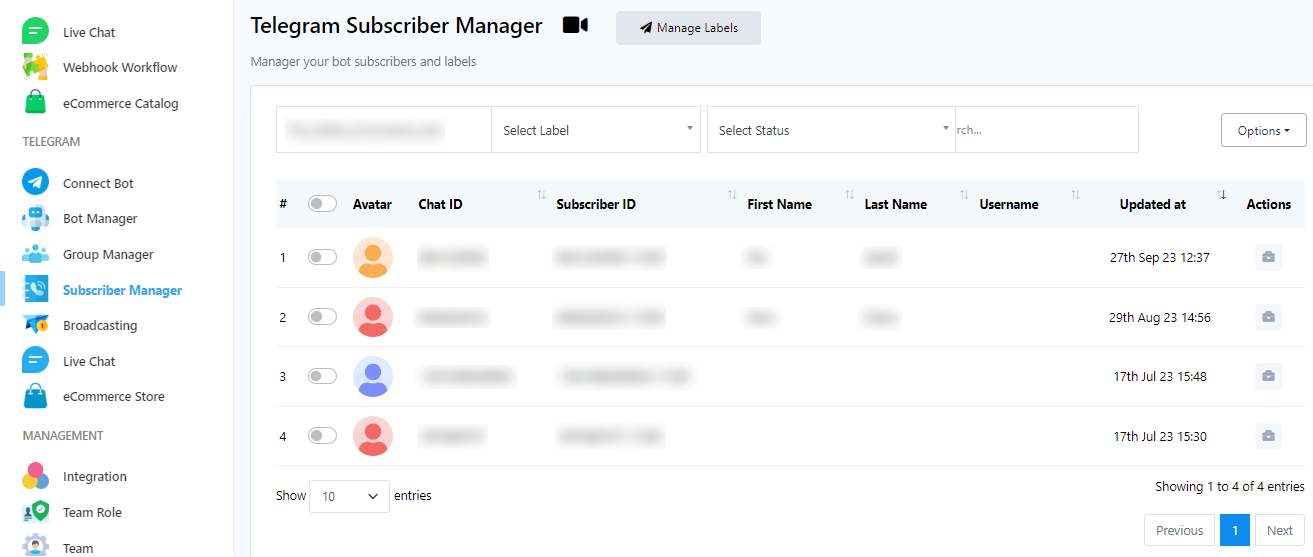
Search for subscribers
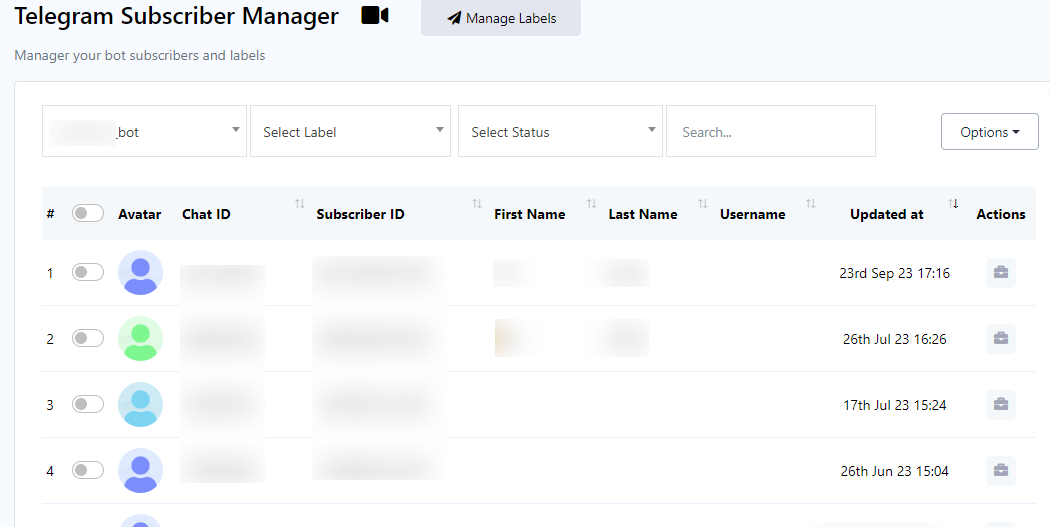
To search for subscribers, please follow these steps:
- Begin by selecting a bot from the dropdown menu located on the left side of the input bars.
- Next, choose a label from the dropdown menu adjacent to the bot selection.
- Once you`ve selected a label, proceed to choose either `subscribed` or `unsubscribed` from the dropdown menu.
- Finally, utilize the search bar to initiate the search based on the criteria you`ve specified in the previous steps.
Options
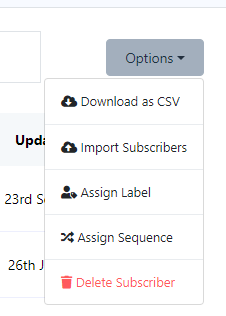
Now navigate to the `Options` button, a versatile feature that enables you to execute a variety of tasks. Upon clicking the Options button, a dropdown menu will unveil an array of choices:
- Download as CSV
- Import Subscribers
- Assign Labels
- Assign Sequences
- Delete Subscribers
Import subscribers
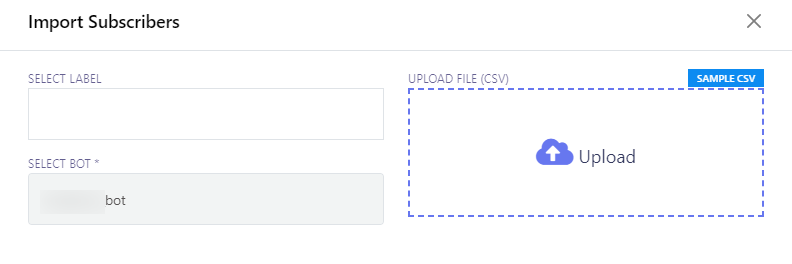
To import subscribers, follow these steps:
- Locate the `Import Subscribers` option in the menu.
- Click on the `Import Subscribers` menu, which will open a modal form titled `Import Subscribers`.
- Within the modal form, you will find two crucial fields:
- Select Label: Choose a label that corresponds to the subscribers you intend to import.
- Select Bot: Specify the bot to which you want to assign the imported subscribers.
- Select the appropriate bot for importing subscribers.
- If you have specific labels associated with the subscribers you want to import, you can designate them here.
- Click the `Upload` button to initiate the import process.
Assign Label
To assign subscribers to a label, follow these steps:
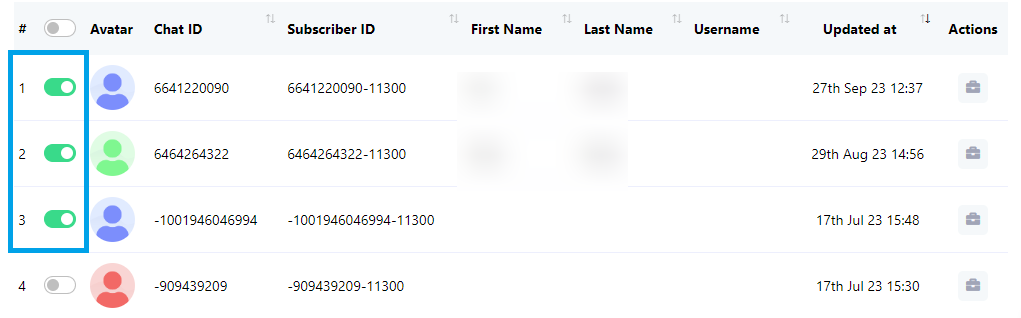
- In the list of subscribers, toggle the subscribers you want to assign to a label.
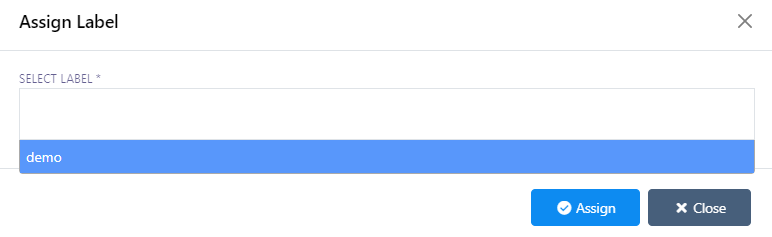
- Click on `Options` and then choose `Assign Label`.
- Select a pre-existing label from the list. Users can also select multiple labels if needed.
- Click the `Assign` button to complete the assignment process.

Assign Sequence
To assign subscribers to a sequence, follow these steps:
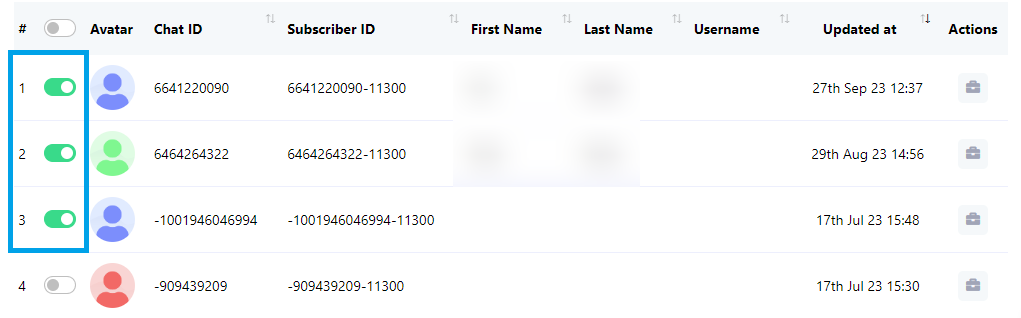
- In the list of subscribers, toggle the subscribers you want to assign to a sequence.
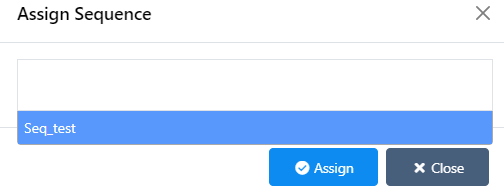
- Click on `Options` and then choose `Assign Sequence`.
- Select a pre-existing sequence from the list. Users can also select multiple sequence if needed.
- Click the `Assign` button to complete the assignment process.
Delete Subscribers
To assign subscribers to a sequence, follow these steps:
- In the list of subscribers, toggle the subscribers you wish to delete. You can toggle a single subscriber or multiple subscribers according to your preferences.
- Click on the `Options` menu and select `Delete Subscriber`.
- Confirm the deletion by clicking the `Delete` button.
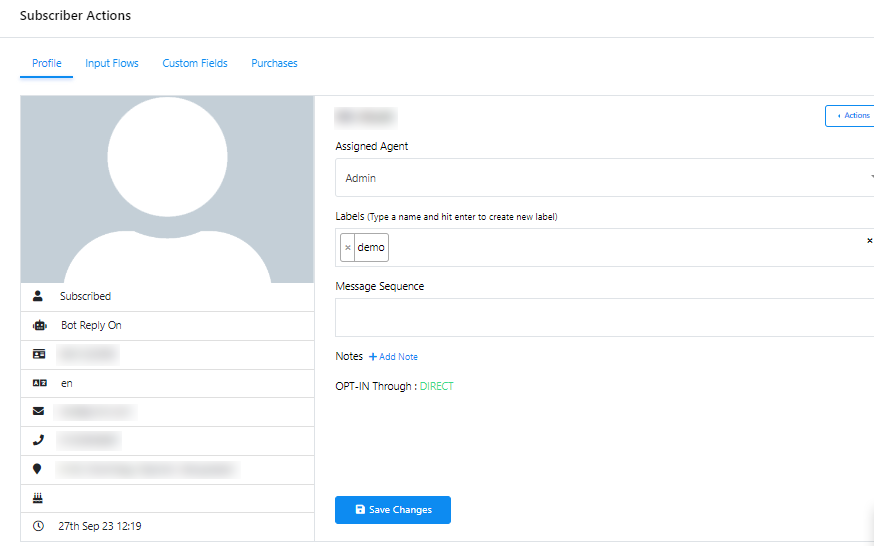
Subscriber Actions
For Subscriber Actions, follow these steps:
- Click on the `Subscriber Action` button.
- In the modal, you can perform various actions, including unsubscribing a subscriber, pausing or resuming the bot`s replies, resetting the user`s input flow, or syncing subscriber data.
- Click on `Assigned agent` to designate an agent who can engage in real-time conversations with the subscriber.
- Utilize the `Labels` input field to search for and select an existing label, or you can create a new label.
- Select an existing message sequence to send to the subscriber by clicking on `Message Sequence`.
- To save all the settings you`ve configured, click on `Save Changes`.
- Access `Input Flows` to review data collected from a user`s input flow.
- Click `Custom Fields` to inspect data collected from Custom Fields.
- For an overview of every purchase made by the subscriber, click on `Purchases`.